HMI Configuration is one of the most important skills in industrial automation. A properly configured Human Machine Interface allows operators to communicate with machines safely, monitor production in real time, and control industrial processes with confidence. Whether you are connecting an HMI to a PLC for the first time or improving an existing system, understanding HMI Configuration helps you build reliable, user-friendly, and efficient automation solutions.
Modern factories rely on HMIs to display machine status, process values, alarms, trends, and control buttons in one easy-to-use interface. Without proper configuration, even the best hardware may fail to deliver accurate information or smooth machine operation. Learning the correct setup process reduces downtime, improves productivity, and makes troubleshooting much easier.
This guide explains HMI Configuration in simple language for beginners while also providing practical knowledge for technicians, engineering students, and automation professionals. By the end of this article, you will understand how to prepare an HMI project, connect it to a PLC, configure communication, create operator screens, test the application, and avoid common mistakes that often cause communication or performance issues.
What Is HMI Configuration?
HMI Configuration is the process of setting up a Human Machine Interface so it can communicate with industrial equipment and display meaningful information. During this process, engineers create graphical screens, assign PLC tags, configure communication settings, define alarms, and test every function before the system goes into operation.
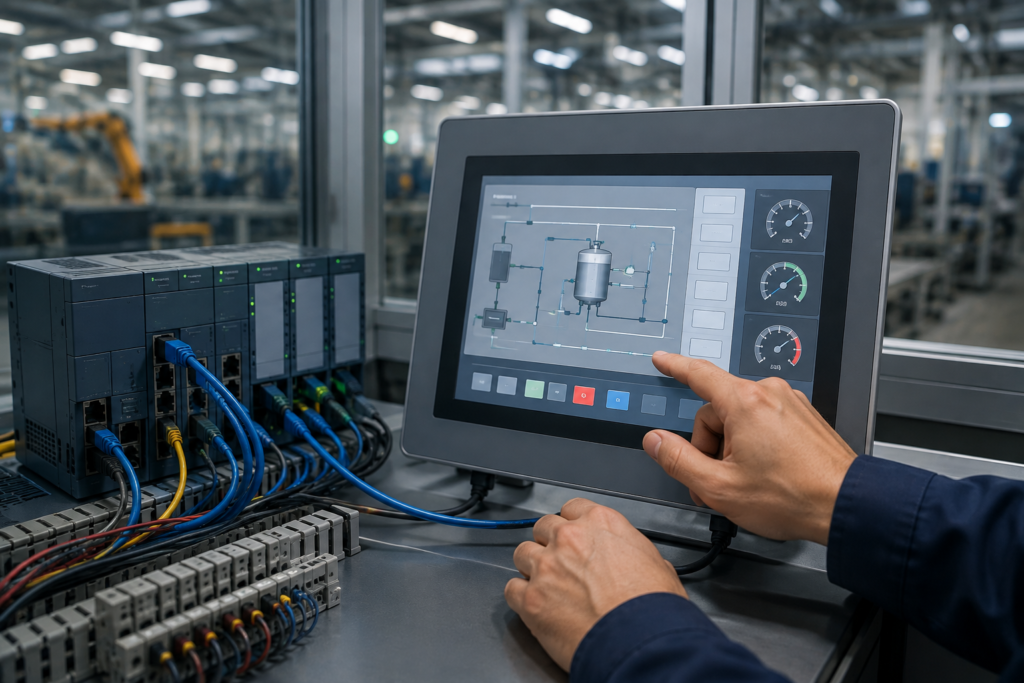
An HMI acts as the bridge between people and machines. Operators use it to start or stop equipment, monitor production values, change process parameters, and respond to alarms. A properly configured interface makes machine operation easier, safer, and more efficient.
Every industrial project has different requirements. For that reason, the HMI Configuration process may vary depending on the PLC model, communication protocol, HMI software, and machine design. However, the basic principles remain the same across most automation systems.
Why HMI Configuration Matters in Industrial Automation
A well-planned HMI Configuration improves both machine performance and operator experience. Instead of dealing with complicated controls, operators receive a clean interface that presents important information clearly. This reduces confusion and helps employees react quickly whenever the process changes.
Accurate configuration also improves communication between the HMI and PLC. Reliable data exchange ensures that process values remain correct and control commands reach the machine without unnecessary delays. Stable communication supports consistent production and reduces unexpected interruptions.
Another important benefit is easier maintenance. When screens are organized properly and tags follow logical naming conventions, technicians can identify faults much faster. This saves valuable maintenance time and reduces production losses.
A professional HMI setup also increases workplace safety. Critical alarms become easier to recognize, emergency controls remain accessible, and operators receive clear information before taking corrective action. These improvements lower the chances of human error during machine operation.
How an HMI Works with a PLC
Before starting HMI Configuration, it is important to understand how an HMI communicates with a PLC.
The PLC controls the machine by reading sensors and operating outputs. The HMI does not control the machine directly. Instead, it exchanges data with the PLC through an industrial communication network.
When an operator presses a button on the HMI, the command is sent to the PLC. The PLC processes the command according to its control program and updates the machine. At the same time, the PLC sends live process information back to the HMI, allowing operators to monitor machine status, temperatures, pressures, motor conditions, production counts, and alarms in real time.
This continuous exchange creates a smooth interaction between humans and automated equipment.
What You Need Before Starting HMI Configuration
Successful HMI Configuration begins with proper preparation. Having the right hardware, software, and project information saves time during installation and testing.
First, select an HMI that supports your PLC and communication protocol. Compatibility prevents unnecessary connection problems later in the project.
Next, install the correct HMI programming software on your computer. Every manufacturer provides dedicated software for creating screens, configuring communication, and downloading projects to the HMI.
You should also have the PLC program available. The PLC tag database allows the HMI to display process values and control machine functions accurately.
Reliable communication hardware is equally important. Depending on your project, this may include Ethernet cables, USB cables, serial communication cables, or industrial switches.
Finally, collect the machine requirements before creating the HMI project. Knowing which values need monitoring, which buttons operators require, and which alarms must appear on the screen makes the entire configuration process much smoother.
Common Software Used for HMI Configuration
Different manufacturers provide different software platforms for HMI Configuration, but the overall workflow remains similar. Most engineering software allows users to create graphical screens, configure communication, assign PLC variables, manage alarms, log historical data, and test projects before deployment.
Although the interface changes from one software package to another, the core configuration process follows the same sequence. Once you understand the fundamentals, learning another HMI platform becomes much easier.
This universal approach helps automation professionals work with different HMI brands throughout their careers without starting from the beginning each time.
Planning Before You Configure an HMI
Good planning is often the difference between a reliable automation system and one that constantly requires maintenance. Before opening the HMI software, think about how operators will interact with the machine.
Design screens that are simple and organized. Group similar information together so operators can find important data quickly. Keep navigation consistent across all pages and place frequently used controls where they are easy to access.
Use clear tag names during HMI Configuration instead of confusing labels. Logical naming improves project readability and makes future maintenance much easier.
Planning also includes deciding which alarms require immediate attention and which information should appear on trend graphs or status pages. A structured design creates a professional HMI that remains easy to use even as the automation system grows.
Step 1: Create a New HMI Project
The first stage of HMI Configuration begins with creating a new project inside your HMI development software. Every manufacturer provides its own software environment, but the overall workflow remains very similar. Starting with a clean project allows you to organize screens, communication settings, and device parameters from the beginning.
Open the HMI programming software and create a new project. Select the correct HMI model that matches your physical device. This step is important because the software automatically loads the correct screen resolution, memory capacity, communication options, and hardware features.
Choosing the wrong HMI model can create compatibility issues later. Always verify the model number before moving to the next stage of HMI Configuration.
A properly created project forms the foundation for the entire application. Spending a few extra minutes verifying the project settings helps prevent unnecessary problems during deployment.
Step 2: Configure the Communication Settings
The next step in HMI Configuration is establishing communication between the HMI and the PLC. Without reliable communication, the HMI cannot display live data or send commands to the controller.
Begin by selecting the PLC manufacturer and controller model inside the communication settings. Most HMI software includes drivers for many popular PLC families, making this process straightforward.
After selecting the correct driver, configure the communication interface. Many modern systems use Ethernet because it offers fast data transfer and simple network management. Some legacy systems still rely on serial communication depending on the application.
Enter the correct communication parameters such as the IP address, port number, station number, or communication speed according to your automation network. These values must match the PLC configuration exactly.
Once the settings are complete, save the project and verify that no communication errors appear inside the software.
A correctly configured communication channel is one of the most important parts of successful HMI Configuration.
Step 3: Import or Create PLC Tags
After communication is ready, the next phase of HMI Configuration focuses on PLC tags.
Tags represent the data shared between the PLC and the HMI. Every machine value shown on the screen depends on correctly configured tags.
Examples include motor status, conveyor speed, water level, tank pressure, temperature, production count, emergency stop status, and alarm indicators.
Many engineering software packages allow direct import of PLC variables, which saves considerable time and reduces manual errors. If automatic import is unavailable, you can create tags manually by assigning the correct PLC memory addresses.
Each tag should have a meaningful name. Clear naming improves project readability and makes troubleshooting much easier later.
Instead of using unclear names, choose descriptive names that explain the actual machine function. Organized tags simplify maintenance for every engineer who works on the project in the future.
Step 4: Design the Main HMI Screen
Once the tags are available, HMI Configuration moves to screen development.
The main screen is usually the first page operators see after starting the machine. It should present only the most important information without unnecessary graphics or excessive animation.
A clean interface allows operators to understand machine status quickly and react with confidence.
Arrange indicators, buttons, values, and status lamps in a logical order. Place related information close together so navigation feels natural.
Large buttons improve usability, especially in industrial environments where operators often wear gloves.
Maintain consistent spacing, font sizes, and colors throughout the project. A professional layout improves readability and reduces operator mistakes.
Good screen design is not about adding more graphics. It is about presenting information clearly and efficiently.
Step 5: Connect Screen Objects to PLC Tags
Designing the screen is only part of HMI Configuration. Every object must also communicate with the PLC.
Each display field, indicator, switch, button, graph, or numerical value should be linked to the appropriate PLC tag.
For example, a Start button writes a value to the PLC when pressed. A motor status indicator reads a PLC variable and changes color according to machine operation.
Temperature displays continuously update using analog values received from the controller.
Correct tag assignments ensure that every screen element reflects real machine conditions.
Before continuing, verify every connection carefully. A single incorrect address can produce inaccurate information or unexpected machine behavior.
Step 6: Configure Buttons and Operator Controls
Operator controls allow users to interact with the automation system safely.
During HMI Configuration, assign specific actions to every button according to the machine design.
Start, Stop, Reset, Manual Mode, Auto Mode, and Emergency Reset are common control functions.
Each button should perform only one clearly defined action.
Avoid placing critical controls too close together. Proper spacing reduces accidental touches and improves overall safety.
Visual feedback is also important. Buttons should change appearance when activated so operators know their commands have been accepted.
A responsive interface increases operator confidence and creates a smoother production workflow.
Step 7: Configure Alarms
Alarms play an essential role in industrial automation. They immediately notify operators whenever abnormal conditions occur.
As part of HMI Configuration, configure alarms for important process events such as motor overload, high temperature, low pressure, communication failure, sensor malfunction, emergency stop activation, or production faults.
Each alarm should include a clear message that explains the actual problem.
Avoid vague descriptions because they slow down troubleshooting.
Good alarm messages help maintenance teams identify faults faster and restore production with minimal downtime.
It is also helpful to organize alarms by priority so operators recognize critical situations immediately.
Step 8: Add Data Display Objects
An effective HMI Configuration project provides real-time information that operators can understand instantly.
Display objects include numerical values, level indicators, gauges, trend charts, progress bars, timers, counters, and process status indicators.
Choose the display type according to the data being presented.
Numeric values work well for temperatures and pressures.
Trend graphs help operators monitor changing process conditions.
Progress bars clearly display tank levels and production percentages.
Using the right visualization improves decision-making without overwhelming the operator.
Step 9: Configure Navigation Between Screens
Industrial machines often require multiple HMI pages.
Navigation should remain simple throughout the entire HMI Configuration project.
Create separate screens for production, alarms, maintenance, diagnostics, settings, and historical data if required.
Navigation buttons should remain consistent across every page.
Operators should always know where they are and how to return to the main screen.
Simple navigation reduces training time and improves operational efficiency.
Step 10: Save and Verify the Entire Project
Before downloading the project to the HMI, perform a complete project review.
Modern HMI software automatically checks for configuration errors, missing tags, invalid addresses, duplicate names, and communication issues.
Resolve every warning before deployment.
A careful review during HMI Configuration prevents unnecessary troubleshooting after installation.
Testing the project inside the software simulator is also recommended whenever simulation features are available.
Simulation allows engineers to verify screens, buttons, alarms, and navigation before connecting to the actual machine.
Early testing saves valuable engineering time and improves project reliability.
Step 11: Download the Project to the HMI
After completing the project design, the next stage of HMI Configuration is downloading the application to the physical HMI device. This process transfers all project data, communication settings, screens, alarms, and tags from the computer to the operator panel.
Before starting the download, ensure the HMI is powered on and connected correctly. A stable connection helps prevent interruptions during the transfer process.
Most HMI software provides a download option that automatically detects compatible devices on the network. If the software cannot find the HMI, verify the communication settings, network connection, and device address before trying again.
During the download, avoid disconnecting cables or turning off the power. An interrupted transfer may leave the project incomplete and require another download.
Once the transfer finishes successfully, restart the HMI if necessary. The newly configured application should appear automatically.
Step 12: Test Communication Between the HMI and PLC
Testing is one of the most important parts of HMI Configuration. Even if the project downloads successfully, every function should be verified before the machine enters normal operation.
Begin by checking whether live process values appear correctly on the HMI screen. Sensor readings, counters, timers, and machine status indicators should update without noticeable delays.
Next, operate several control buttons and confirm that the PLC responds correctly. For example, pressing a Start button should activate the appropriate machine sequence, while pressing Stop should halt operation safely.
Observe the communication status during testing. Stable communication indicates that the HMI and PLC are exchanging information correctly.
If values fail to update or commands do not reach the PLC, review the communication parameters and tag assignments before making further changes.
Step 13: Verify Every Screen Function
Successful HMI Configuration requires more than basic communication. Every screen should perform exactly as intended.
Open each page and verify that navigation buttons work properly. Ensure that every indicator displays the correct status and that each control performs the expected action.
Review numerical displays carefully. Values should remain accurate and refresh continuously as process conditions change.
Trend graphs should display changing values correctly, while alarm screens should update immediately when a fault occurs.
Testing every function individually helps identify hidden issues before operators begin using the system.
Step 14: Test Alarm Operation
Alarms play a critical role in industrial safety, making alarm testing an essential part of HMI Configuration.
Create safe test conditions that simulate common faults without placing equipment or personnel at risk.
Confirm that alarm messages appear immediately when abnormal conditions occur. Operators should clearly understand the problem without needing additional explanation.
Verify that alarm acknowledgement functions operate correctly and that cleared alarms disappear only after the fault has been resolved.
If alarm history is enabled, confirm that every event is recorded accurately with the correct date and time.
Reliable alarm operation improves both safety and maintenance efficiency.
Step 15: Check Data Accuracy
An HMI is only useful when it displays reliable information. During HMI Configuration, compare HMI values with the actual PLC values.
Temperature readings, motor speeds, production counts, pressures, and flow rates should match the controller data.
If incorrect values appear, inspect the PLC addresses, data types, scaling parameters, and communication settings.
Even a small addressing mistake can display incorrect process information and lead to poor operational decisions.
Careful verification increases confidence in the automation system.
Common HMI Configuration Mistakes
Many beginners encounter problems during HMI Configuration because they overlook small details. Understanding these common mistakes helps avoid unnecessary delays.
Selecting the wrong PLC driver is a frequent error. If the communication driver does not match the controller, the HMI cannot exchange data correctly.
Incorrect IP addresses or communication parameters also prevent successful communication. Double-check every network setting before troubleshooting more complex issues.
Another common mistake involves assigning the wrong PLC addresses to HMI tags. Incorrect addresses cause displays to show inaccurate values or prevent control buttons from functioning.
Poor screen organization can also reduce operator efficiency. Overcrowded screens filled with excessive graphics make important information difficult to find.
Ignoring alarm priorities creates additional confusion during machine faults. Critical alarms should always remain easy to identify.
Finally, skipping project testing often results in avoidable maintenance work after installation.
How to Troubleshoot HMI Configuration Problems
Even experienced engineers occasionally encounter configuration issues. A structured troubleshooting process makes problem solving faster and more effective.
Start by checking the physical connections. Loose Ethernet cables, damaged connectors, or unstable power supplies often cause communication failures.
Next, verify that both the HMI and PLC use the correct communication settings. Matching IP addresses, protocols, and device numbers are essential for reliable operation.
If communication remains unavailable, test the network connection using standard diagnostic tools before changing the project configuration.
Review every PLC tag carefully. Incorrect addresses, unsupported data types, or typing errors commonly prevent values from updating.
When screen objects fail to operate correctly, inspect the object properties and confirm that each control references the correct PLC variable.
Software diagnostic logs can also provide useful information about communication failures or configuration errors.
Working through these checks methodically usually identifies the problem much faster than making random changes.
Best Practices for Reliable HMI Configuration
Professional engineers follow consistent practices that improve system reliability and simplify future maintenance.
Maintain a clean project structure throughout HMI Configuration. Organize screens logically and group related functions together.
Use descriptive tag names instead of short abbreviations whenever possible. Clear naming improves readability for every engineer who works on the project later.
Keep screen layouts simple. Operators should find important information immediately without searching through unnecessary graphics.
Use consistent colors for machine status indicators. Similar conditions should always appear with the same visual style across every screen.
Document communication settings, PLC addresses, software versions, and project revisions before completing the installation. Good documentation simplifies future upgrades and troubleshooting.
Always create backup copies of completed projects. Reliable backups protect valuable engineering work and reduce recovery time if hardware fails.
Testing every project before commissioning should become a standard practice rather than an optional step. Thorough testing builds confidence and minimizes unexpected problems during production.
Why Proper HMI Configuration Improves Industrial Performance
A carefully planned HMI Configuration provides long-term benefits that extend beyond basic machine control.
Operators complete routine tasks more efficiently because information appears clearly and controls remain easy to access.
Maintenance teams diagnose faults faster thanks to organized alarms, meaningful tag names, and logical screen layouts.
Production managers gain more accurate operational data, allowing better monitoring of equipment performance and process efficiency.
Reliable communication between the HMI and PLC also reduces unexpected downtime and helps maintain consistent production quality.
As industrial automation continues to evolve, well-designed HMI systems remain essential for improving productivity, safety, and operational reliability.
Advanced Tips for Better HMI Configuration
As your automation projects become more complex, improving your HMI Configuration can make the system easier to operate and maintain. Keep screens simple, display only important information, and organize navigation so operators can move between pages without confusion.
Use consistent colors for machine status throughout the project. Reserve attention-grabbing colors for alarms or critical conditions. This approach improves readability and helps operators respond more quickly.
It is also a good practice to review the project regularly. Updating the interface as machine requirements change keeps the HMI useful and reliable over time.
Keep Your HMI Project Secure
Security should always be part of HMI Configuration. Protect the HMI with user accounts and passwords so only authorized personnel can access important settings.
Create different access levels for operators, maintenance staff, and administrators. This prevents accidental changes and improves overall system reliability.
Keeping software and firmware updated also helps maintain a stable and secure automation environment.
Frequently Asked Questions
What is HMI Configuration?
HMI Configuration is the process of setting up an HMI to communicate with a PLC, display process data, and allow operators to monitor and control industrial equipment.
Why is HMI Configuration important?
It ensures reliable communication, accurate data display, improved operator efficiency, and safe machine operation.
Can one HMI connect to multiple PLCs?
Yes. Many modern HMI systems support communication with multiple PLCs, provided the hardware and software are compatible.
Which communication protocols are commonly used for HMI Configuration?
Common protocols include Ethernet/IP, Modbus TCP, Modbus RTU, PROFINET, and OPC UA, depending on the automation system.
How do I know if my HMI is communicating with the PLC?
If live values update correctly and operator commands control the machine as expected, the communication is working properly.
Conclusion
HMI Configuration is an essential part of every successful industrial automation project. A properly configured HMI improves communication with the PLC, displays accurate process data, and provides operators with a simple and reliable interface for monitoring and controlling machines. Careful planning, correct communication settings, well-organized screens, and thorough testing all contribute to a stable and efficient automation system.
Whether you are configuring an HMI for a small machine or a large industrial process, following the right approach helps reduce downtime, improve productivity, and simplify future maintenance. As your experience grows, you can build more advanced HMI applications with greater confidence. By applying the best practices explained in this guide, you can create reliable, user-friendly, and professional HMI systems that support safe and efficient industrial operations for years to come.

Pingback: AI in Industrial Automation: Complete Beginner’s Guide