Sudden servo drive faults can stop production lines, disrupt machine cycles, and increase maintenance costs. Servo Motor Troubleshooting helps engineers identify electrical faults, mechanical problems, and feedback errors before they cause extended downtime. Furthermore, a structured diagnostic process allows maintenance teams to locate root causes instead of repeatedly resetting alarms. This guide explains common servo drive fault codes, practical testing methods, and corrective actions that engineers can apply in industrial automation systems.
Common Fault Codes in Servo Motor Troubleshooting
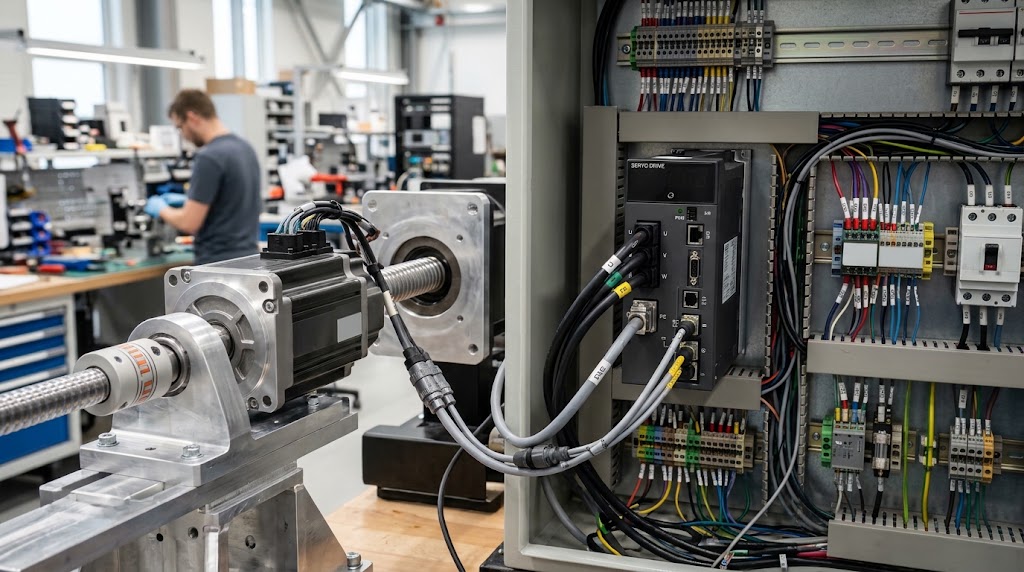
Modern servo drives continuously monitor motor current, DC bus voltage, encoder feedback, and position deviation. Consequently, the drive displays an alarm when a monitored value exceeds its configured limits. However, the displayed code identifies a symptom rather than always revealing the underlying cause. Effective Servo Motor Troubleshooting therefore requires engineers to examine drive parameters, electrical connections, mechanical loads, and operating conditions before replacing components.
Over current (OC) Alarms
Over current alarms occur when a servo drive measures current above its permitted threshold. Short circuits between motor phases, damaged cable insulation, defective motor winding, and excessive acceleration demands can trigger these alarms. Furthermore, a jammed axis or seized bearing can force the motor to produce excessive torque. Engineers should first record the alarm code and check the manufacturer's troubleshooting instructions before inspecting the power circuit.
Next, isolate the equipment according to the site's electrical safety procedures and disconnect the power supply. Allow the DC bus capacitors to discharge, then verify the absence of hazardous voltage with an appropriately rated meter. After confirming electrical safety, disconnect the motor leads from the drive and inspect the cables for damaged insulation, loose terminals, and signs of overheating. A digital multi meter can help engineers check phase-to-phase resistance and identify obvious winding imbalances. However, engineers must follow the motor manufacturer's specifications because normal resistance values vary by motor design. A standard multi meter also cannot reliably detect every insulation breakdown, so use an appropriate insulation resistance tester only when the manufacturer permits it and the drive electronics remain disconnected.
Furthermore, inspect the motor cable for shorts to ground and compare the three winding resistance readings. Significant differences may indicate a damaged winding or connection. If the electrical tests show no obvious problem, examine the mechanical load for binding, seized bearings, and obstructed movement. Finally, review acceleration settings and torque limits before restarting the machine under controlled conditions.
Over voltage (OV) Alarms
Over voltage alarms commonly occur when a servo motor decelerates a moving load too quickly. During deceleration, the motor can operate as a generator and return kinetic energy to the servo drive's DC bus. Consequently, the DC bus voltage may exceed its permitted limit when the braking circuit cannot dissipate the regenerated energy efficiently. High supply voltage, an undersized braking resistor, or an unsuitable deceleration profile can also contribute to the problem.
First, check the drive's alarm history and determine whether the fault occurs during stopping, rapid direction changes, or normal operation. Next, inspect the braking resistor, its wiring, and its terminals for visible damage or loose connections. Use the manufacturer's procedure to measure resistor resistance after isolating the circuit and confirming that no hazardous voltage remains. Compare the measured value with the specified resistance and power ratings. In addition, verify that the drive's regenerative braking circuit supports the selected resistor and load conditions.
Review the deceleration time and regenerative energy settings in the drive software. An excessively short stopping time can increase regenerated energy and push the DC bus voltage beyond its limit. Therefore, increase the deceleration time when the application allows it, and confirm that the machine still meets its stopping requirements. Engineers should also check the incoming supply voltage and inspect the braking transistor or regenerative unit if the alarm persists. Never install a lower-resistance braking resistor without confirming the drive's permitted resistance range.
Encoder Feedback Communication Errors
Encoder feedback errors occur when a servo drive loses reliable position or speed information from the motor. The encoder supplies feedback that allows the drive to compare actual motion with the commanded movement. Consequently, an intermittent signal can cause unstable motion, incorrect positioning, sudden stops, or an encoder alarm. Damaged feedback cables, loose connectors, broken shield connections, and electromagnetic interference from nearby power cables can all disrupt communication.
Begin by recording the exact alarm code and checking the manufacturer's fault-code documentation. Next, isolate the equipment and inspect both encoder connectors for bent pins, damaged locking mechanisms, contamination, and loose contacts. Examine the cable along its full length, paying particular attention to tight bends, crushed sections, and areas near moving machine components. Furthermore, verify that the installation separates encoder wiring from high-voltage motor cables according to the manufacturer's routing recommendations.
Use a suitable multi meter to check cable continuity when the manufacturer permits this test. Disconnect the cable at both ends before measuring individual conductors, and compare the results with the wiring diagram. Also, inspect shield termination and grounding arrangements to identify broken connections or poor contact. However, ordinary continuity testing cannot detect every intermittent signal problem or high-frequency interference issue. Therefore, use the drive's diagnostic monitor or approved communication test equipment when the fault occurs only during machine movement. Replace damaged cables with compatible shielded cables and follow the manufacturer's grounding requirements.
Position Deviation Errors (Tracking Faults)
Position deviation faults occur when the actual motor position differs from the commanded position by more than the drive's configured tolerance. The PLC or motion controller may command a specific movement, but the motor may struggle to follow that command when the mechanical load exceeds its capabilities. For example, a jammed ball screw, excessive friction, worn timing belts, or a poorly balanced load can prevent the axis from reaching its target position. Consequently, the servo drive may trigger a tracking alarm to protect the machine and maintain control accuracy.
First, examine the alarm history and compare the commanded position with the actual feedback position. Next, check whether the fault occurs during acceleration, constant-speed movement, deceleration, or a particular section of travel. This information helps engineers distinguish mechanical resistance from tuning or configuration problems. Furthermore, verify the electronic gear ratio, travel limits, torque limits, and motion profile settings against the machine design.
To investigate mechanical resistance, isolate the machine, secure any suspended loads, and follow the manufacturer's procedure for safely releasing the servo brake or disconnecting the motor from the mechanism. Never force a coupled motor shaft or manually move an axis while hazardous energy remains present. Once the equipment reaches a verified safe state, check the ball screw, guide rails, bearings, and transmission components for binding or unusual resistance. In addition, inspect lubrication and confirm that the load moves within the expected mechanical limits.
If the mechanical system operates correctly, review the position-loop gain and related tuning parameters. Excessive gain can cause oscillation, while insufficient gain may produce sluggish tracking under demanding loads. Therefore, adjust tuning parameters only within the manufacturer's recommendations and evaluate the machine under controlled conditions. Finally, confirm that the drive follows commanded movements accurately throughout the operating range before returning the equipment to production.
Step-by-Step Servo Motor Troubleshooting Workflow
Following a structured diagnostic procedure prevents unnecessary component replacements and saves critical time on the factory floor. Therefore, engineers must apply a systematic methodology whenever executing servo motor troubleshooting on complex motion control systems.
Step 1: Performing Visual Inspections and Terminal Checks
Before applying power to the panel, technicians must start servo motor troubleshooting with a thorough physical inspection. First, isolate main line power from the panel and lock out the safety disconnect switch. Consequently, check all power terminals, control signal wires, and ground lugs for visible signs of overheating, insulation damage, or loose terminal screws. Furthermore, ensure that all encoder connectors latch firmly into the drive housing, as vibration often causes subtle physical disconnections over time.
Step 2: Measuring Input Power and DC Bus Voltages
After completing visual checks, proceed to the next phase of servo motor troubleshooting by measuring supply electrical parameters. Restore control power safely while keeping the main motor power supply disabled. Next, use a calibrated digital multimeter to verify incoming three-phase supply voltages across line terminals. In addition, measure the DC bus voltage across terminals $(P+)$ and $(N-)$ to confirm that the internal power circuit operates within the manufacturer's specified voltage window before enabling the drive output stage.
Step 3: Conducting Motor Winding and Insulation Tests
If the drive repeatedly trips on overcurrent alarms, servo motor troubleshooting requires direct testing of the motor stator windings. Disconnect motor leads ($U, V, W$) from the servo drive output terminals. Subsequently, measure phase-to-phase electrical resistance across all three windings using a precision ohmmeter. Equal resistance readings indicate healthy motor coils. Furthermore, perform an insulation resistance test between each phase line and the physical motor ground casing using a high-voltage insulation tester to rule out internal ground faults.
Step 4: Verifying Encoder Cable Integrity and Noise Shielding
Because high-frequency switching noise corrupts feedback signals, encoder cable verification forms a vital part of servo motor troubleshooting. Ensure that signal cables route through separate wire ducts away from high-voltage 480V power lines or adjacent Variable Frequency Drives. Consequently, verify that low-impedance shield wires ground properly at the drive enclosure. Replacing shielded signal wires with high-flex twisted-pair cables eliminates phantom encoder alarms completely.
Best Practices to Prevent Frequent Drive Alarms
Implementing proactive maintenance strategies significantly reduces emergency breakdown calls and simplifies future servo motor troubleshooting routines. First, establish low-impedance ground paths throughout the control cabinet by connecting all drive ground terminals to a central copper grounding bar. Furthermore, calculate dynamic load inertia accurately to ensure external braking resistors absorb regenerative energy efficiently during high-speed deceleration cycles. Finally, maintain clean enclosure climate control systems by servicing panel fans and replacing air filters regularly to prevent drive overheating.
Frequently Asked Questions
How do technicians reset a latched servo drive alarm?
Technicians can clear most non-critical alarms by cycling control board power or issuing a digital fault reset pulse from the central PLC. However, effective servo motor troubleshooting dictates that you must diagnose and resolve underlying electrical or mechanical issues before clearing the fault code to prevent permanent hardware damage.
Why does a servo drive trip only during rapid deceleration?
Rapid deceleration forces the motor to operate as a generator, feeding kinetic energy back into the drive's internal DC bus capacitor bank. Consequently, if the system lacks adequate braking resistor capacity to dissipate this incoming energy rapidly, the drive trips automatically on an overvoltage alarm, requiring structured servo motor troubleshooting to verify deceleration times and brake circuit continuity.
Can a faulty encoder cause an overcurrent alarm on a servo drive?
Yes, a failing encoder or corrupted feedback signal can cause immediate overcurrent trips. When the drive loses accurate rotor position tracking, it applies incorrect current vectors to the motor windings, which causes sudden current spikes during acceleration and requires immediate servo motor troubleshooting of the feedback cable.
How do I distinguish between a mechanical jam and a motor electrical failure?
To isolate the root cause during servo motor troubleshooting, decouple the motor from the load coupling or gearbox. Next, attempt to rotate the mechanical axis manually to feel for binding or heavy resistance. If the mechanical axis rotates smoothly while unpowered, the issue lies in the drive parameters, power cabling, or internal winding insulation.
Why is proper shield grounding critical for servo motor encoder cables?
Servo drives switch power at high carrier frequencies, generating severe electromagnetic interference along nearby conductors. Consequently, proper servo motor troubleshooting always involves checking that encoder cables feature 360-degree shield grounding at the cabinet panel to prevent signal corruption and random phantom communication alarms.
Conclusion
Industrial maintenance technicians frequently encounter complex motion control failures that halt entire production lines, making proficiency in servo motor troubleshooting an essential skill on the factory floor. By executing a methodical approach—starting with visual terminal inspections and checking physical wiring integrity—engineers can rapidly isolate initial electrical faults without risking secondary damage to expensive hardware. Furthermore, documenting each alarm code accurately sets a strong foundation for any subsequent diagnostic phase.
Transitioning deeper into technical diagnostics requires meticulous voltage testing and feedback signal verification during active servo motor troubleshooting. Technicians must measure DC bus voltage parameters carefully and test motor winding resistances to rule out internal short circuits or insulation degradation. Additionally, ensuring proper shield grounding on encoder cables eliminates high-frequency electrical noise, preventing random communication glitches and ensuring stable closed-loop motion performance.
Ultimately, proactive planning and structured execution transform routine maintenance operations through professional servo motor troubleshooting. Maintaining panel climate control, sizing external braking resistors correctly, and avoiding blind component replacements saves critical downtime and protects your capital investments. Keep this comprehensive reference guide accessible near your industrial automation panels to streamline daily troubleshooting routines and ensure maximum operational efficiency across your facility.

Pingback: Multi Axis Servo Control: PLC Electronic Gearing Guide